Showing posts with label applique. Show all posts

Back to Braids

After a long hiatus, I'm back on the braid coat. The amount of time sunk into this one is getting ridiculous, and I need to finish it to move on, so I'm trying to buckle down. 

Progress has been made, a side has been joined together, and it no longer quite looks like just an odd flat rectangle with long bits attached. I'm liking how it curves away a bit in the front. 

And the inside, looking good, just gotta keep on it. It's not the most exciting project, and progress moves very slowly on it, which is why I think I've been dragging my feet getting back to it. 

More Dear Jane Blocks this week. These, on the other hand are just super fun to make, even if the quilt as a whole will take forever to finish. G-1,2,3 and 4. G-3 is really pretty lopsided, my applique is never going to be all the great, I think.

It's been a while since I posted the entire thing so far. I'm nearly half way through the blocks. I'm thinking now I'd like to sash them with chocolate brown. I know I don't want to use black or white, but I'm between a medium gray and a brown. I think a brown will give it a bit of a 70's feel. 

Special Deliveries

So 200th Blog Post Super Suprise Package winner Lety R-Z received their package, and has a little blog post about it here, go look so you can both weep at what you could have won, and check out her adorable felted creatures. PS: Lety, the semi-circle thing is a collar, I think from the 20's.

I got my own package too--sewing machine needles, finally! I also got some new hand needles and some camouflage fabric that will probably become some pants or shorts. And since it's arrived I've been sewing up a streak of spring clothing. Just in time too, all of a sudden it's gotten very warm. 
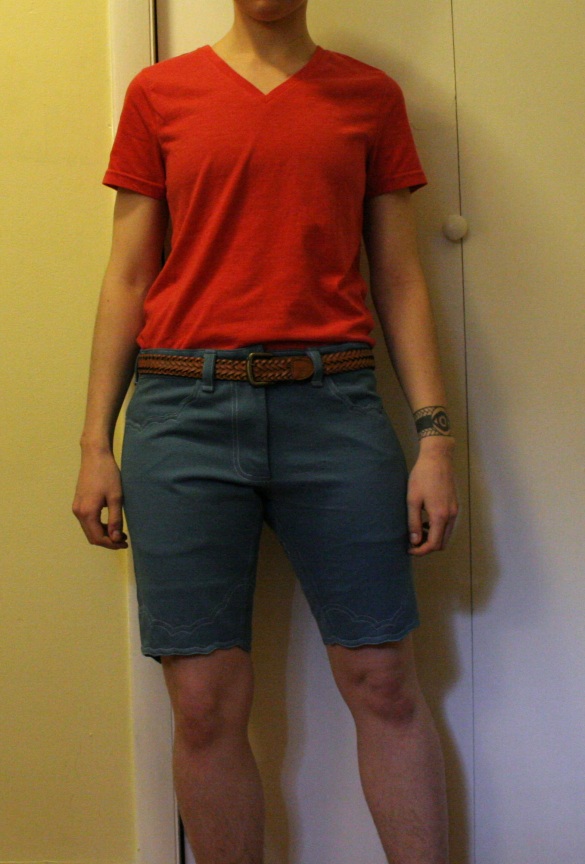
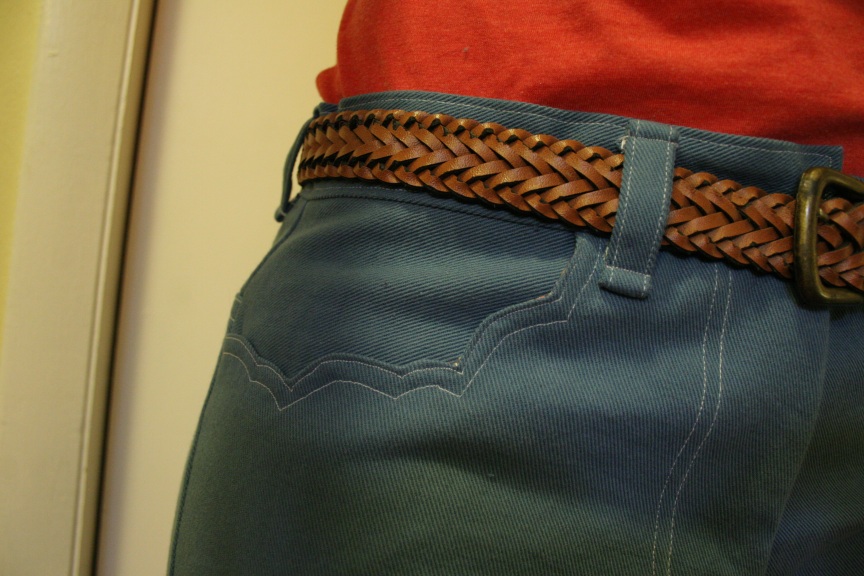
The Cloud Shorts are now 99% finished. Can't call them done because I need to order a snap for the waistband. But everything else is done! The waist band on it got a little stretched somehow, but otherwise I'm pretty happy with them. 

Lookit that topstitching! And yes, the cuff's lined. Pleased with how all this detailing turned out

Pocket topstitching not quite as nice, but still pretty good! My belt loops always look a bit ragged though, working on that. 
Because it was just a shortened 'slim jean' (let's be frank, a blatant trace off an old pair of Levi's 511) the fit on the cloud shorts is very snug on the legs, particularly since I've gained a bit of muscle since I drew up the pattern. While I don't mind it on that pair, I also wanted some looser, wider legged shorts, so I made some alterations. I made the crotch 2 inches lower, and the legs wider. 
 The bottom fabric here is currently testing the above pattern, looks good so far. The above fabric, I'm not sure about. 
The fabrics I had cut in the last post came together to make a new shirt! I think I've finally really gotten the hang of piping, it comes out much more evenly now. 

Oops, forgot to iron it before taken pictures. This shirt is also stuck at 99% done until I get some snaps, going to use some sea green pearl snaps.
 Cuff on the sleeve's got a little curvey detail to it.  
I hand appliqued the little curly things on there, they are a bit lopsided--even though I used freezer paper! Oh well, certainly still wearable. 

And in last (awful) news, my computer recently wiped it's hard drive, leaving me for the first time without my giant image reference folders, and more importantly, without all my syllabi and handouts for school. So that's a whole other project to tackle, that I'm putting off for the moment. 

Bedroom Essentials

It's occurred to me that the two projects I'm working on right now are both for my new bedroom. I've always been awful at decorating, I tend to just go for ugly utilitarian furniture. But I'm trying to make an effort to make our new apartment a little more homey and pleasant on the eyes. I finally bought a bedside table for the bedroom, and stopped using one of Seamus's old amps to put our alarm clock on. Baby steps! 


The backing and batting for the Irish Chain quilt finally arrived. I couldn't find an extra wide backing fabric I liked enough to justify the cost, so I bought 9 yards of a normal width fabric on sale. I think the busy multicolored floral is a good match for the busyness of the front. I'm now waiting for a chance to get to school to use the print tables to baste it together--I don't have enough floor space in my house for it. 


I've also wanted to get some rugs for the apartment, we have pretty rough wood floors, and I think they're going to be cold in the winter.  But any rugs I liked were too expensive, and any that were cheap were ugly and gross feeling, so I decide to make a braided rug. 
$9 from the thrift store for starting materials. I washed and dried them to get the 'thrift store smell' out. Then  I cut them apart and cut into 2" strips. 

Strips joined and wound into balls! The knit fabrics fold onto themselves really nicely and leave a clean edged tube. I went for florals, blues, and purples, and each braid has a light, medium, and dark tone. I figure it will go well with the new quilt, and I have a neat painting on the wall that's largely a periwinkle tone. 

So far I've got yards and yards of braid, but I'm only just starting to spiral it into a circle. 

A Great Man, A Great Chair

Pt. 2 of god knows how many in the catch-up game.

So about a month ago, we got our second assignment in Projects. The new President of our college, Mr. Sean T. Buffington, has taken an interest in the Crafts Department ever since we showed work at his inaugural gala (not to mention dressed up in 50's outfits and helped serve and usher) So he came in and gave us a commision--make a piece for him that both represents him in some way, as well as our own way of working. He gave a short presentation on Crafts objects he already has in his life as a starting of point...but sadly there was no fibers work in it, unless you count a cheesy, etsy-esque stuffed owl his partner got for him...lame!

But in anycase, I didn't find the generic antiquey things and personal effects, or the ubiqutous scandanavian mid-century design all that inspiring. Instead, I decided to work from the man himself. Every since I saw the hand-made t-shirts emblazoned with his face and the words "Buff Daddy" on students at his inauguration, I knew he was a personality to contend with. So I made a portrait of the man, of the 'chairman of the board,' so to speak.


Behind every great man, there is a great chair.

Sitting happily in his office now, it stares at the interns and office workers whenever he's not around to do so.

'Chair for Buff-Buff'
Found chair, new upholstery, applique


Behind the scenes:

The original chair, already half disassembled. I found it in a little side-hallway off of our 'student gallery' down by the ceramics studio. It was with a bunch of other junk, so I decided to assumed it was trash. By the way, taking the upholstery off of this piece of crap was a pain~! So many little freaking staples.


The old cushion. The fabric was this really awful fabric that was almost like a burlap. The arm cushions, when I pried them open, leaked this pollen-colored powder that I can only assume was once foam. (it's worth noting that before I got this chair, I was working on another, only to find some very noxious looking green and peach-colored mold under the fabric. Old furniture is pretty gross)


Unfortunately I don't have any other 'inbetween' shots but here's a rundown on how I got to this stage.
1) Paint--two coats of white, one failed attempt to mix liquid pigment with paint to get orange (got a nasty fleshy color) then two coats of Bright Pumpkin. Orange is Buff's favorite color
2) Replaced upholstery on the actual framework of the chair (under the cushion.) More difficult than I imagined, I had a hard time restuffing it.
3)Did the armrests twice--the first attempt is in the picture, in gray, I later re-did it with the teal fabric and more stuffing, looked much better.
4) Re-did the cushions
And not shown, but
5) Appliquéd the face. Three dang times before I got it right. Finally had to use reverse applique to get the finer black lines to work. There's actually 2 faces, a serious one (shown) on one side, and a happy (sort of 'special') looking one on the other, no picture of that yet, sorry! And now I have 2 creepy almost-faces hanging in my studio.


Alright, that's 2 projects~! I'll try and keep going tomorrow~