Collar Wings

I've always wanted a shirt with little wings for a collar, and I've been surreptitiously trying out different patterns to try and achieve this. My last attempt, I'm happy to say, was a success.
A lot of my other attempts didn't work because I tried to make the wings out of a single piece of fabric, and it was just too many curves, no matter how much I clipped and notched it never wanted to press flat nicely. This time around I made all the little feathers separately and attached them to the main 'wing' part. There's also a little burst of feathers at the center back.
I did run into a little issue. The fabric I used was very tightly woven, and it showed pin marks very obviously, plus I had to get a really accurate edge. I used freezer paper ironed to the fabric to both cut the pattern, then to fold back the edge, like I'm doing freezer paper applique. And *then* I basted that edge.
The wing was turned, the feathers place in a position and then also basted--lots of basting! Then topstitched around the the whole thing. I forgot to take a picture of joining it to the collar stand, but it's only actually attached at the two wing 'shoulders' and the middle back. In the 'dips' it is unattached to the collar stand--it actually lets it sit pretty nicely.
After that fiddly collar the rest of the shirt was pretty simple, just a loose sleeveless shirt based off of one I already own. Bias tape arm holes and bottom hem and two little pockets. The fabric (both of them actually) are thrift store finds, like most of the stuff I work with.
Oof this might be the least flattering picture of me I've ever taken. But you can see the bottom hem, which is curved, sort of like those 70's track shorts, and longer at the back.
Better up-close shot of the collar. Found some great real shell buttons, I like the color of them against the fabric.

I've been on a bit of a roll lately making clothing for myself, I've also hemmed up some shorts from worn out pants. But I'm also finishing up my plaid log cabin quilt, and still searching for fabric for my braid-coat.


Backpacking

So the backpack is done! I messed up on a couple spots, but I learned quite a bit, and it's not bad looking altogether. It's a little bigger than I wanted and a little floppy, and handling all the upholstery fabric got kind of difficult.
Open-I did a drawstring top because I hate putting in zippers. Always have and always will, I'll do anything to avoid them. Double ring closure for the top flap.
Back--Next time I will attach the straps to the side seams, not the bottom seam, it make the bag sit a little weirdly. The straps could use another inch in length too.
Leather bottom for added durability.

In other small project news, I found this lovely cape at the thrift store (half off all winter coats!) that needs some repairs.
Obviously it's missing a button. I'll probably just move up the bottom one, unless I can find a suitable replacement.
The other issue is that some of the fake silk satin lining has shattered/shredded, so I'll either have to patch it or replace it entirely, I haven't decided which.

Fabric Haul and Backpack Beginnings

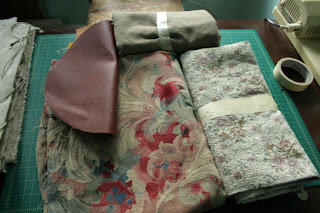
Whenever I find big grab bags of fabric at thrift stores I'm powerless not to buy it. This one was a pretty good buy, a lot of nice florals, but some truly ugly novelty prints too.

The best part was this piece of halloween appliques that are so perfect and neon and weird. Seamus has already claimed the 'Happy Haunting' one for his jean jacket.
This one is my personal favorite.
I also got what I actually went to the store for--some upholstery fabric to try and make a backpack with. I haven't been able to find one that I like and am willing to pay the full price for, so I'm going to give making one a whirl.
I'm fully expected to make some mistakes here-this is a 'practice backpack.' At least the fabric didn't cost much. I'm making it in the style of the oval-bottom draw-string ruck sacks I've see around.
I've also got a method down for cutting my braid pieces, I cut strips first and then cut them into the little parallelograms that I need for the braid.
The box is filling up! Since this photo was taken, the other side is now equally as full. I still need to dye some more silks for the lining though, I'm waiting to do that before anything starts coming together.

Back to Dear Janing

After being stumped by the closure issues on my horn skirt, I decided to take a little break and go back to making some Dear Jane blocks. The last one I finished--B-6--was really fiddly and difficult, and put me off for a bit. But I got on another roll.
I finished up the last 7 blocks of row B. They were all fairly quick sews, definitely easier than B-6! The bottom left one is blue and lime green, it looks a little yellow there.
Row A and B all laid out! Click to see it full sized, I tried to make a little panorama to get them all in, not sure how well I succeeded. I'm thinking I'll eventually sash them with either black or a neutral grey, not sure which yet. Still well on it's way to be the most obnoxious Dear Jane in existence.
Sketching up the coat, not quite ready to sit down and cut a million billion pieces yet.